Install Windows with Local account
Ways to enable local account creation on Windows 11
One issue with the Windows 11 installer is that it requires you to create an account using a Microsoft account. Here are four ways to bypass this requirement.
oobe\bypassnro (disabled in the 25H2)
- Once in the windows installer, press Shift + F10 to open the Command Prompt.
Type the command below and press Enter.
1
 oobe\bypassnro
- The system will reboot automatically.
After the reboot, you should be able to create a local account instead of signing in with a Microsoft account.
New bypass
- Once in the windows installer, press Shift + F10 to open the Command Prompt.
Type the command below and press Enter.
1
 start ms-cxh:localonly
- Create a local account and you will be forwarded through the setup.
Using Rufus to Create a Bootable Media
- Download the latest version of Rufus.
- Insert a USB drive (at least 8GB recommended).
- Open Rufus and select your USB drive under Device.
- Under Boot selection, click SELECT and choose the Windows 11 ISO file.
- Select the
GPTpartition scheme (UEFI Only) - Click START and a popup will appear.
- Select the option to remove requirement for an online Microsoft account and others if need.

- Press
OKand wait for the process to complete
When installing Windows with this boot media, local account creation will be possible.
Edit Windows 11 ISO with NTLite
With NTLite it is possible to enable/disable setting, features and create a custom ISO.
- Download & Install NTLite.
- We can use the Free (limited, non-commercial) license option for personnal use.
Click on images to zoom in
| Step | Image | Description |
|---|---|---|
| 1 |  | After launching NTLite, Add the ISO to edit. |
| 2 |  | Right Click on the read-only ISO that was imported and select New edit. |
| 3 |  | Right Click on the Windows Version you want to edit and select Load |
| 4 |  | Once the loading is complete, new menus will appear on the left. To edit installation requirements, go to Settings > System. |
| 5 |  | You can also edit privacy settings in this section. |
| 6 |  | The Features menu allows you to enable or disable specific Windows features before installation. |
| - | - | Feel free to explore the other settings and options available. Once you’re ready, proceed to the ‘Apply’ section. |
| 7 |  | One feature of the ‘Apply’ option is the ability to remove selected Windows versions from the ISO. |
| 8 |  | My suggestion is to delete most. However do not remove boot.win partitions. It is possible to apply the selected changes to other Windows versions that are not deleted. However, be cautious (see the warning at the end of this table). |
| 9 |  | In the section after image format, you can reapply the changes made earlier to the partitions that were not deleted. |
| 10 |  | Select ‘Create ISO’ in the options to generate a new ISO file after applying the changes. |
| 11 |  | Double-check the overview, then press the ‘Process’ button to begin modifying the ISO. |
| 12 | 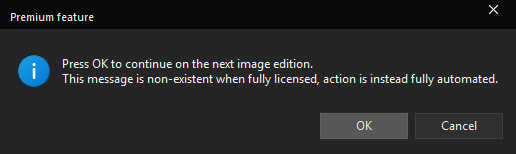 | Each step will need a user interaction to continue because we are using the Free license. |
All selected Windows versions will be mounted and modified individually. Selecting multiple versions will significantly increase the processing time.
At the end of the process, you will have a custom ISO file that can be used for virtual machines or boot media with Ventoy. This is great because it allows for easy deployment across different environments.